Introducing AI Skills in ProcessCoach.ai

Great processes shouldn’t live in someone’s head or get buried in a Google Doc no one opens. In ProcessCoach.ai, you can now use AI Skills to turn your team’s existing SOPs into agents that actually do the work.
Here’s the best part: you don’t need to be technical to build one. If you can write down how your process works, you can upload that SOP (or type it directly into ProcessCoach) and ProcessCoach will turn that into a working Skill, no prompt engineering needed. Onboarding checklists, review workflows, approval steps, whatever you’ve already documented, it can now run itself.
AI Skills puts agent-building in the hands of people who actually know the process best: your team.
Ready to try it?
First, go to the Agent Skills in the left-hand menu on ProcessCoach.
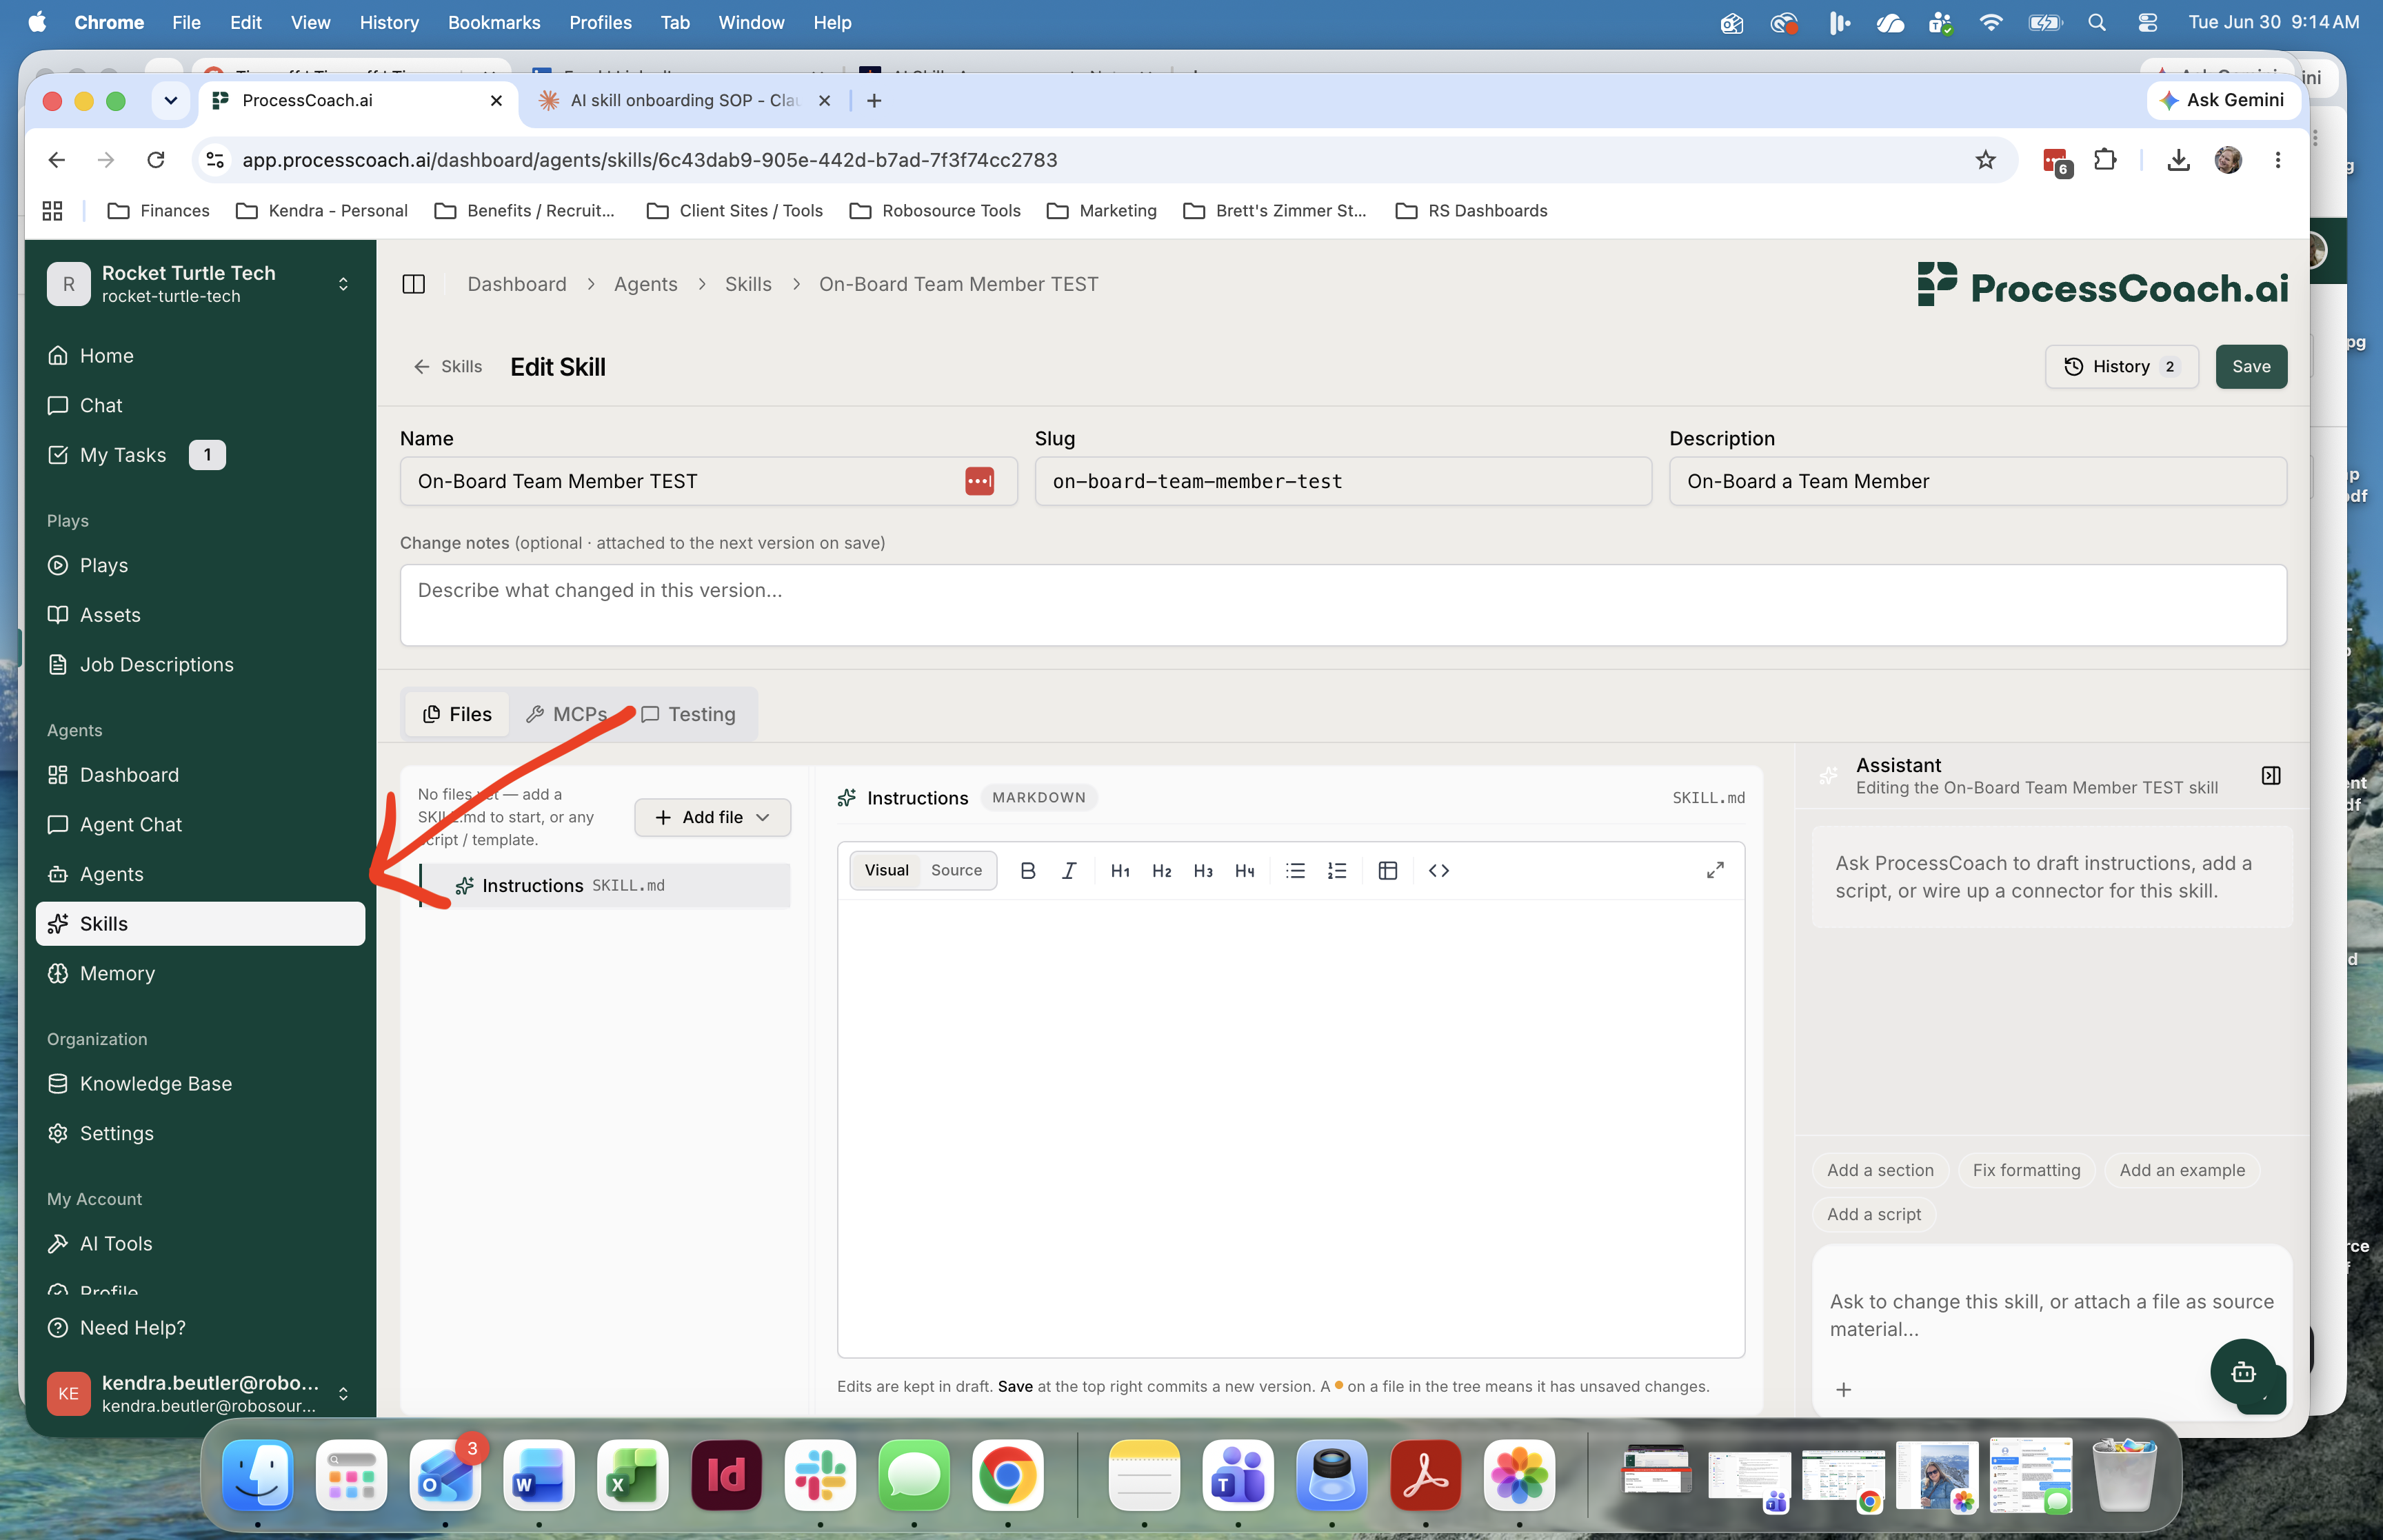
Now you can browse existing skills or create a new one. To browse existing skills, click the “Browse skills.sh” button.
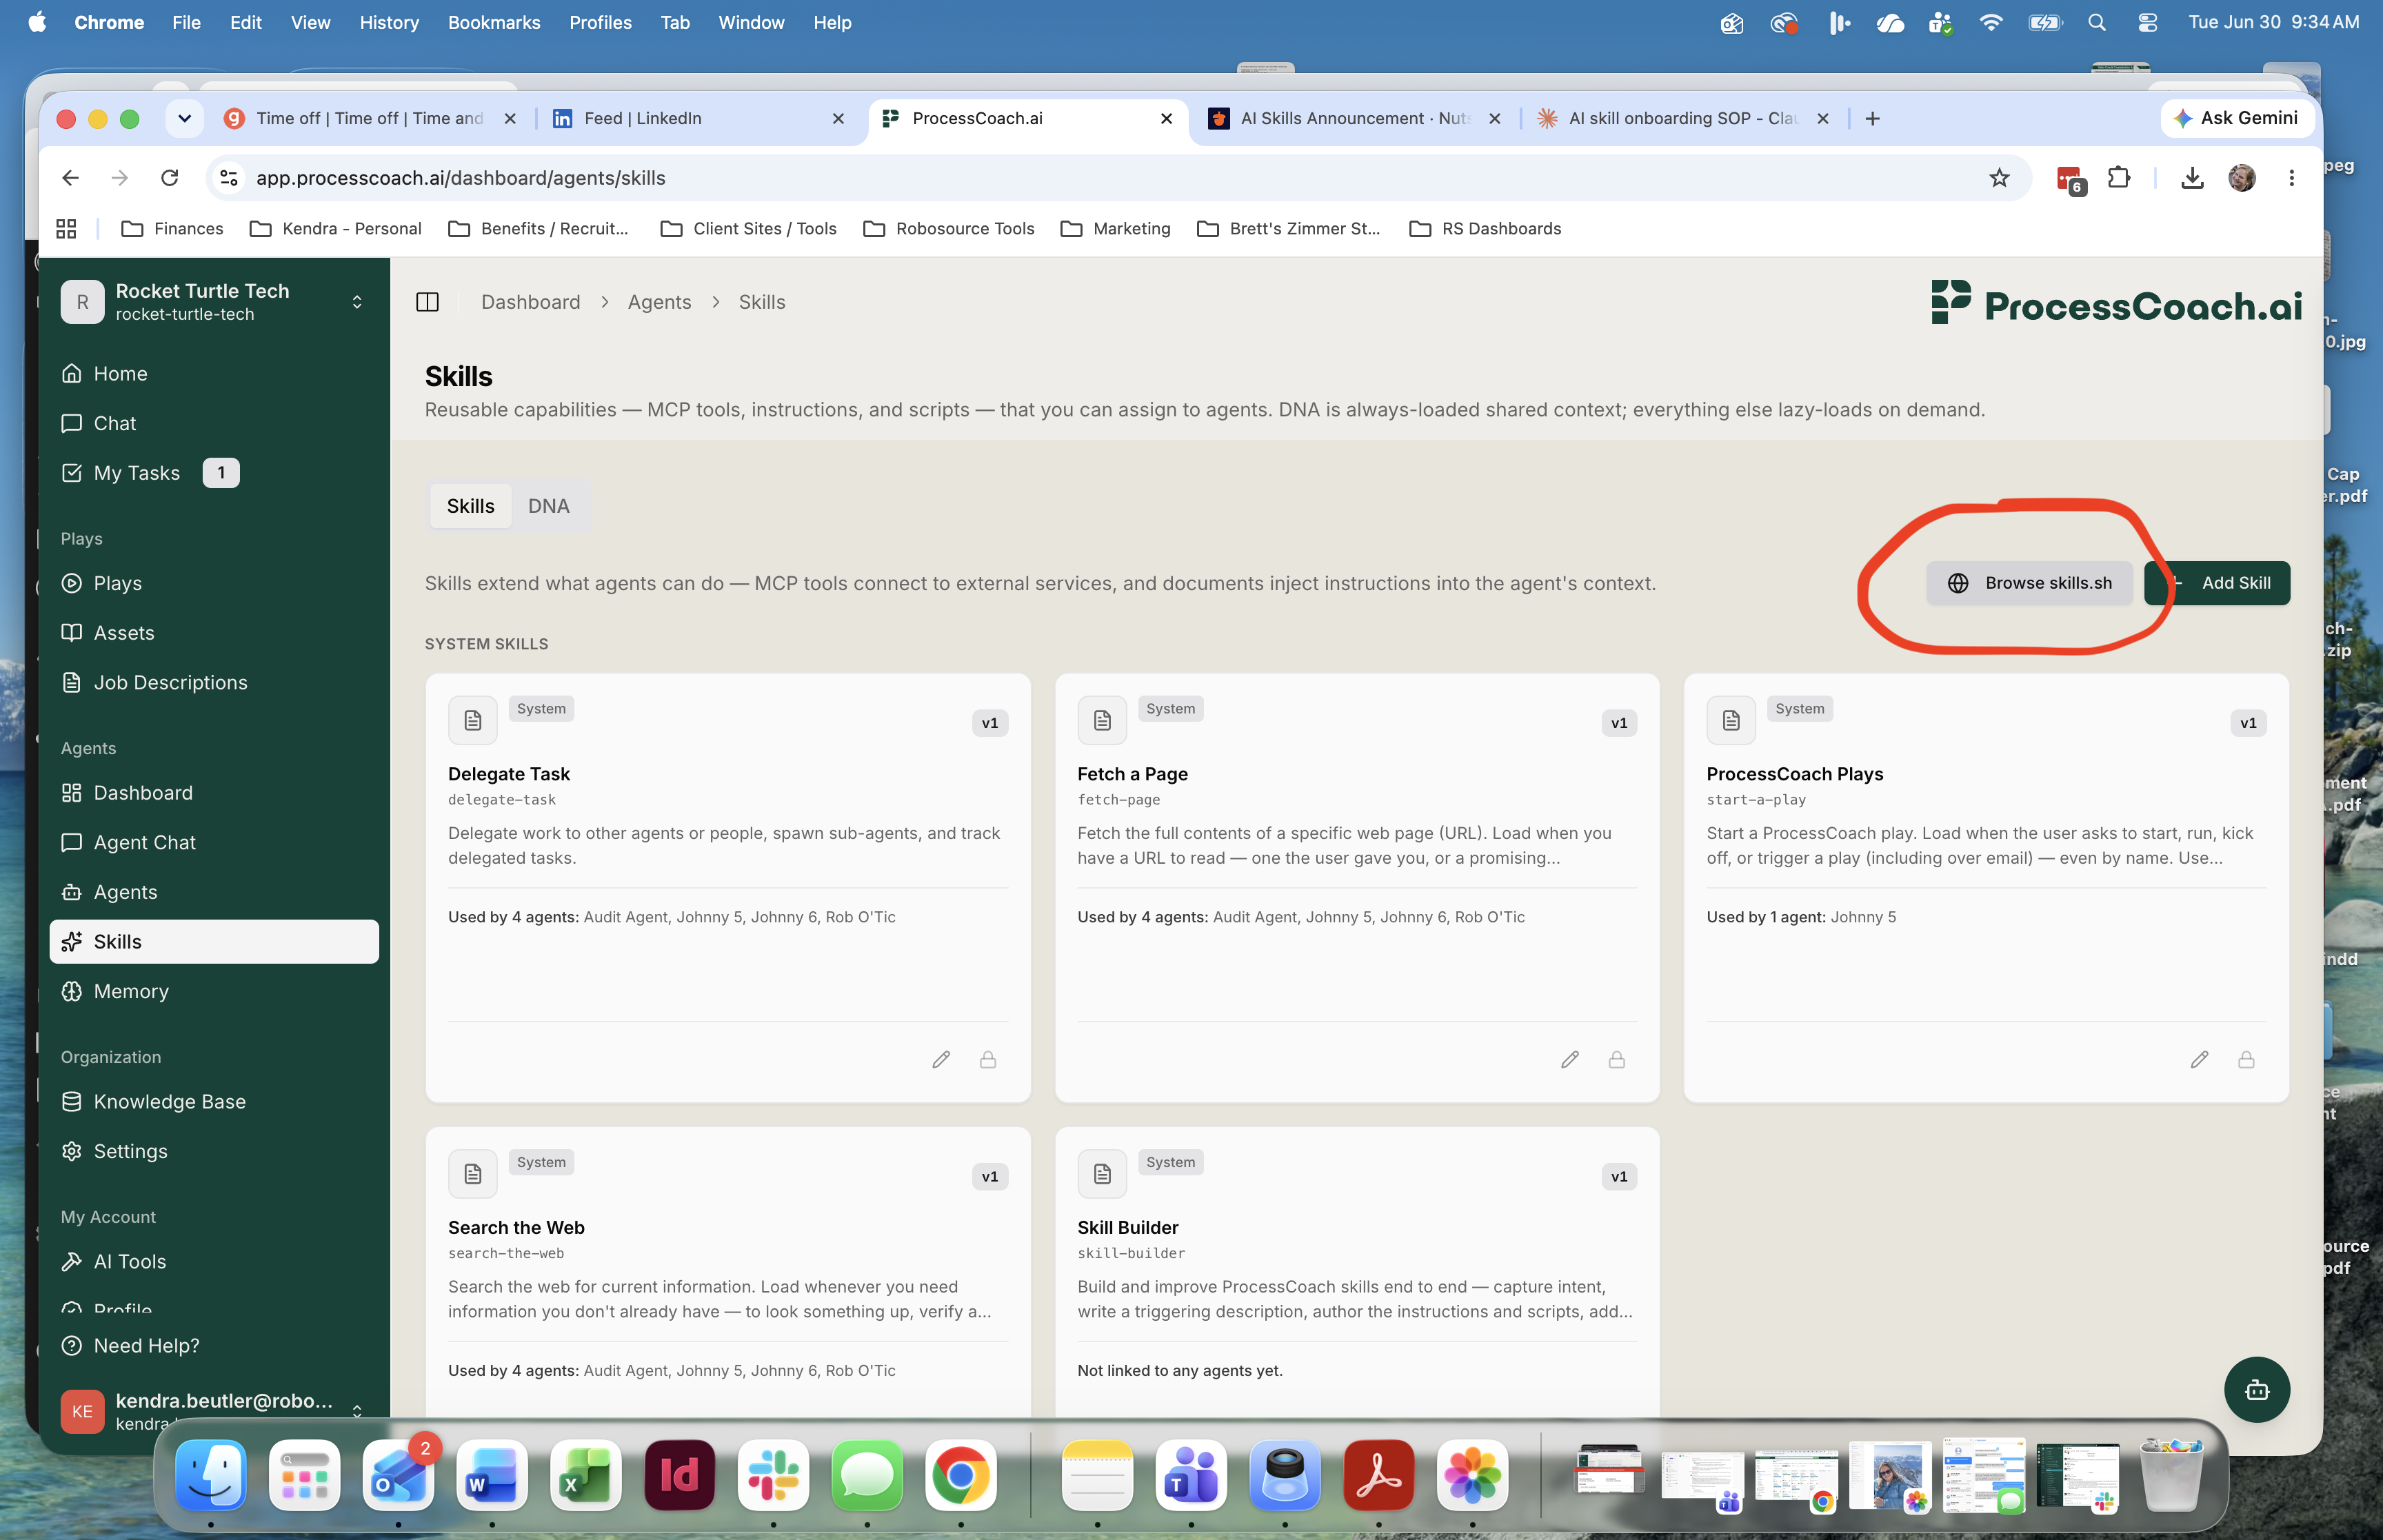
Search for a Skill you are interested in using. I’m interested in seeing what’s available for Adobe software,
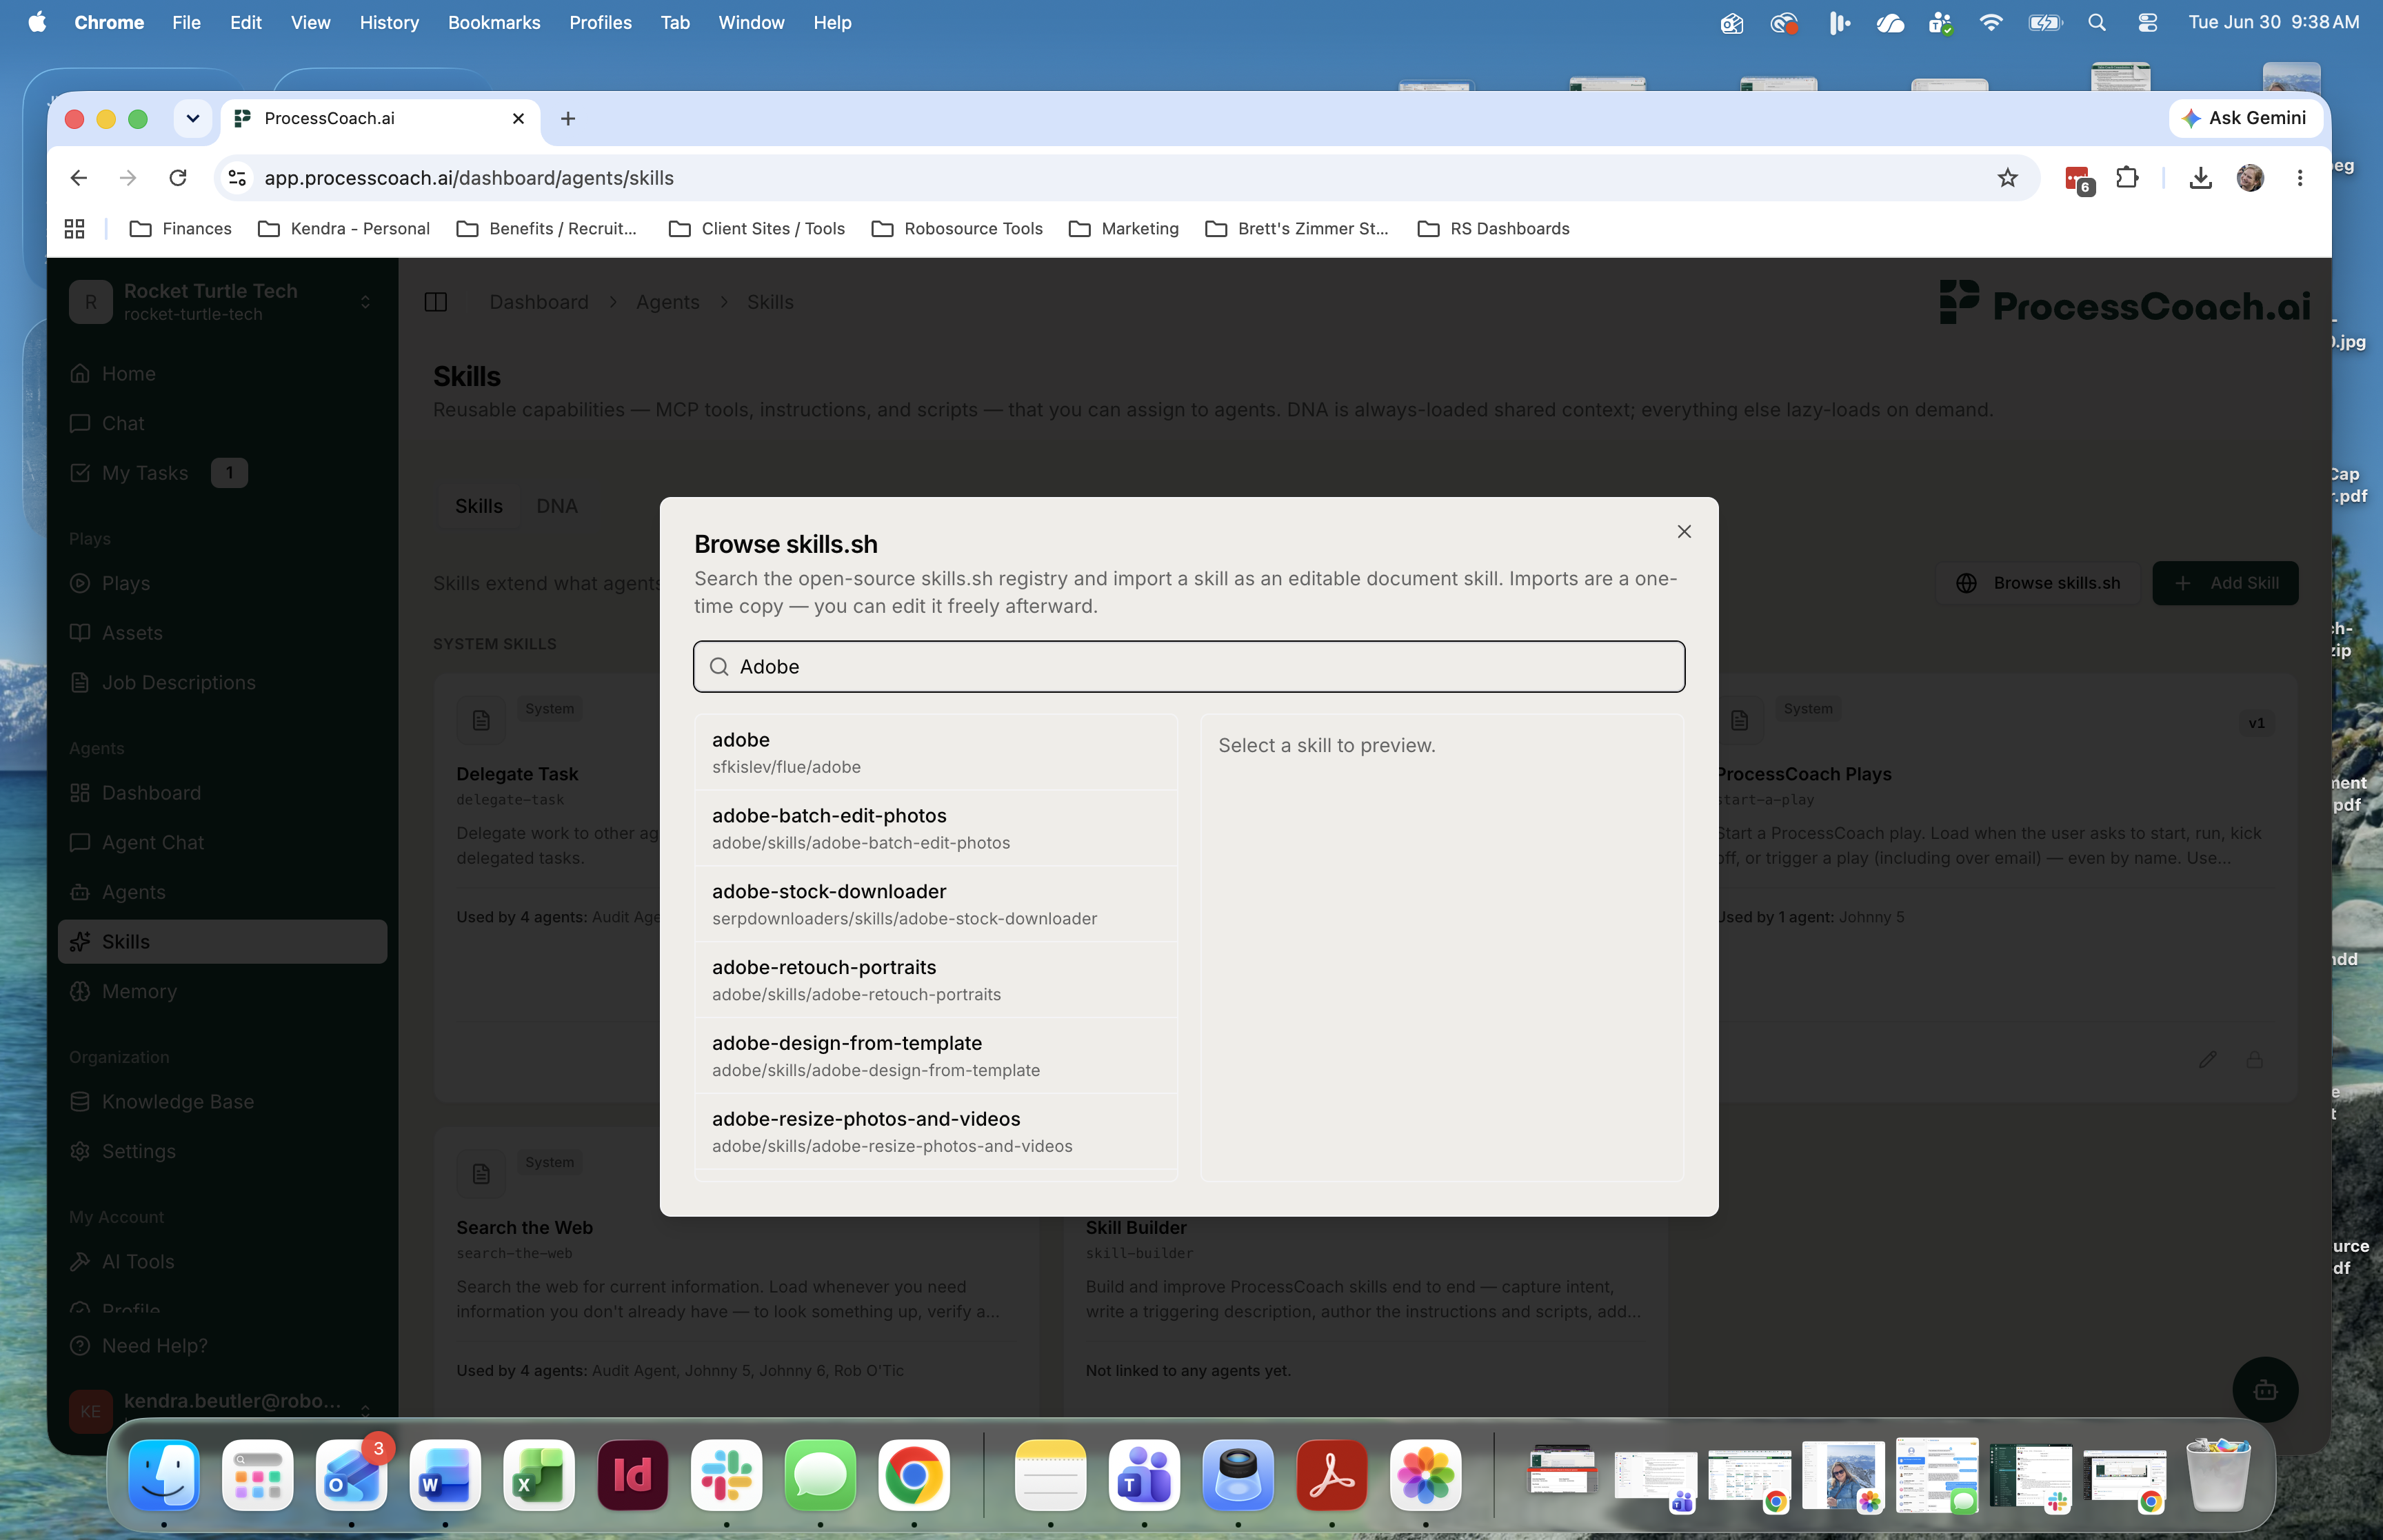
Now you can choose a pre-existing Skill that’s listed here. But maybe you want to write your own Skill. I have a Word Document of my On-Boarding Team Member SOP. Let’s upload that, and ask ProcessCoach to create a Skill from it. First, click the “Add Skill” button.
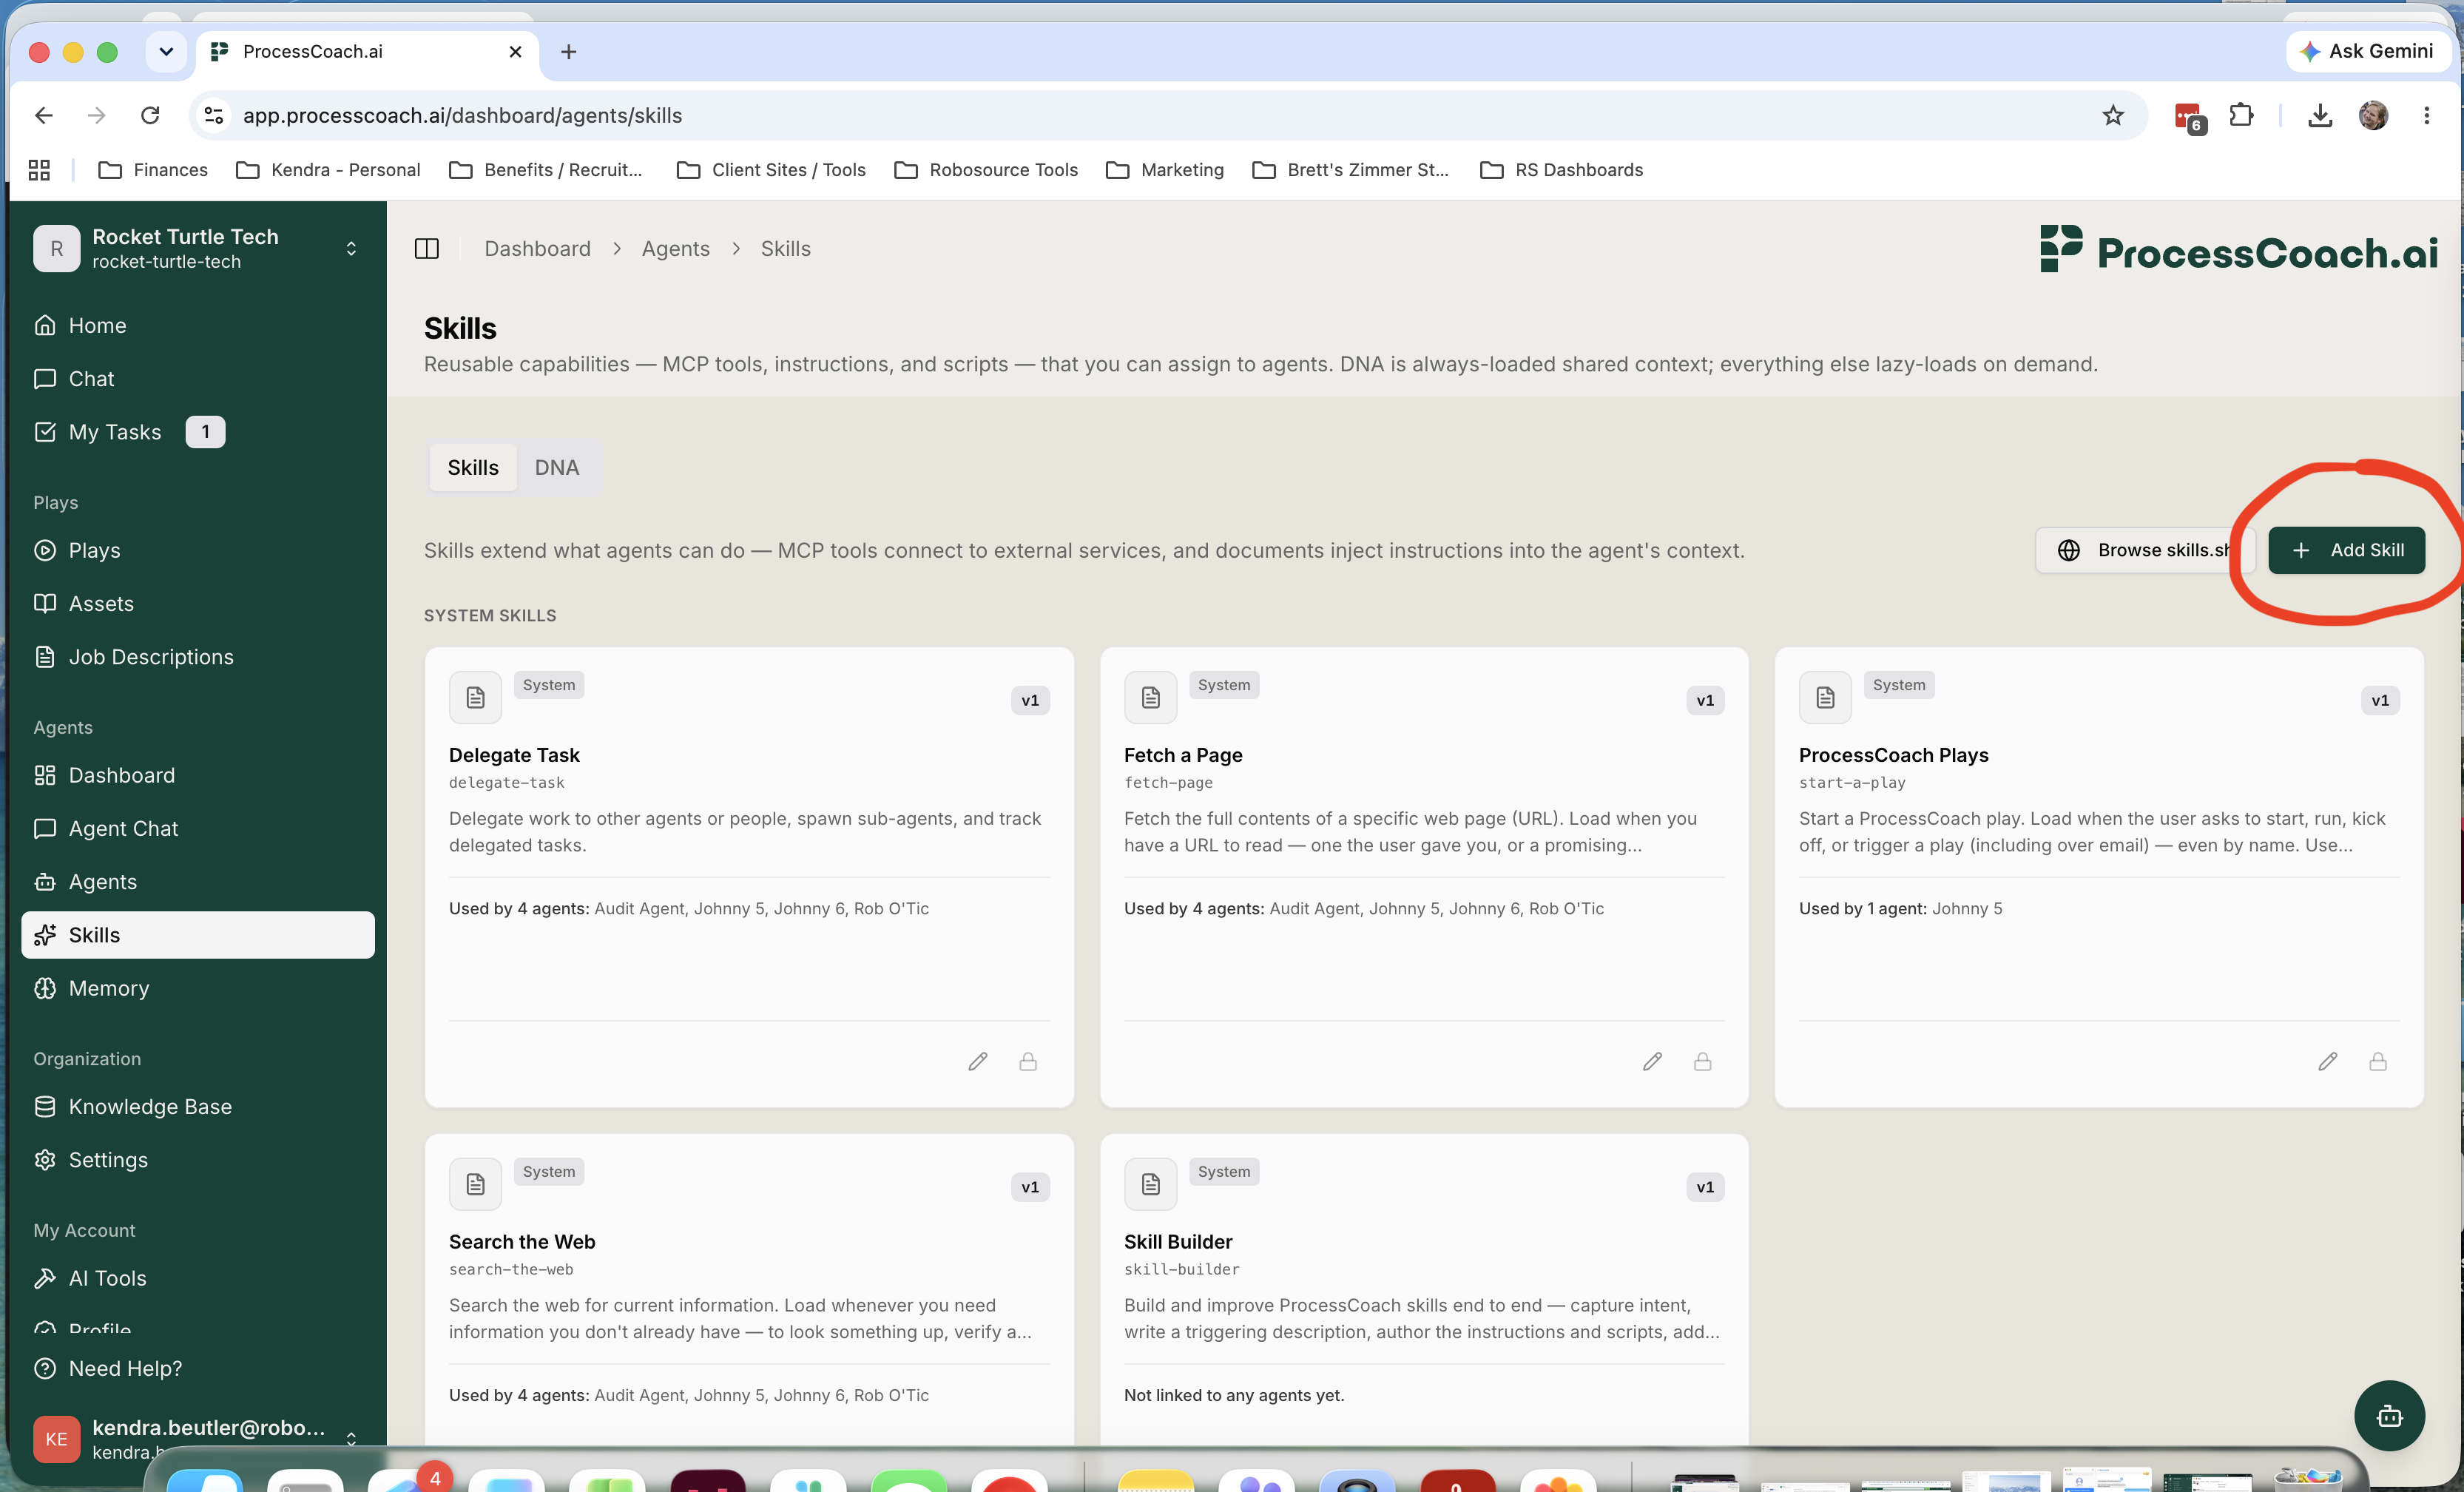
Name your Skill and give it a description. Then you can either type the instructions for the Skill in plain English in the provided space or upload an SOP you’ve already written. Here, I’ll upload my pre-written SOP by clicking the “+” button in the lower right-hand corner.
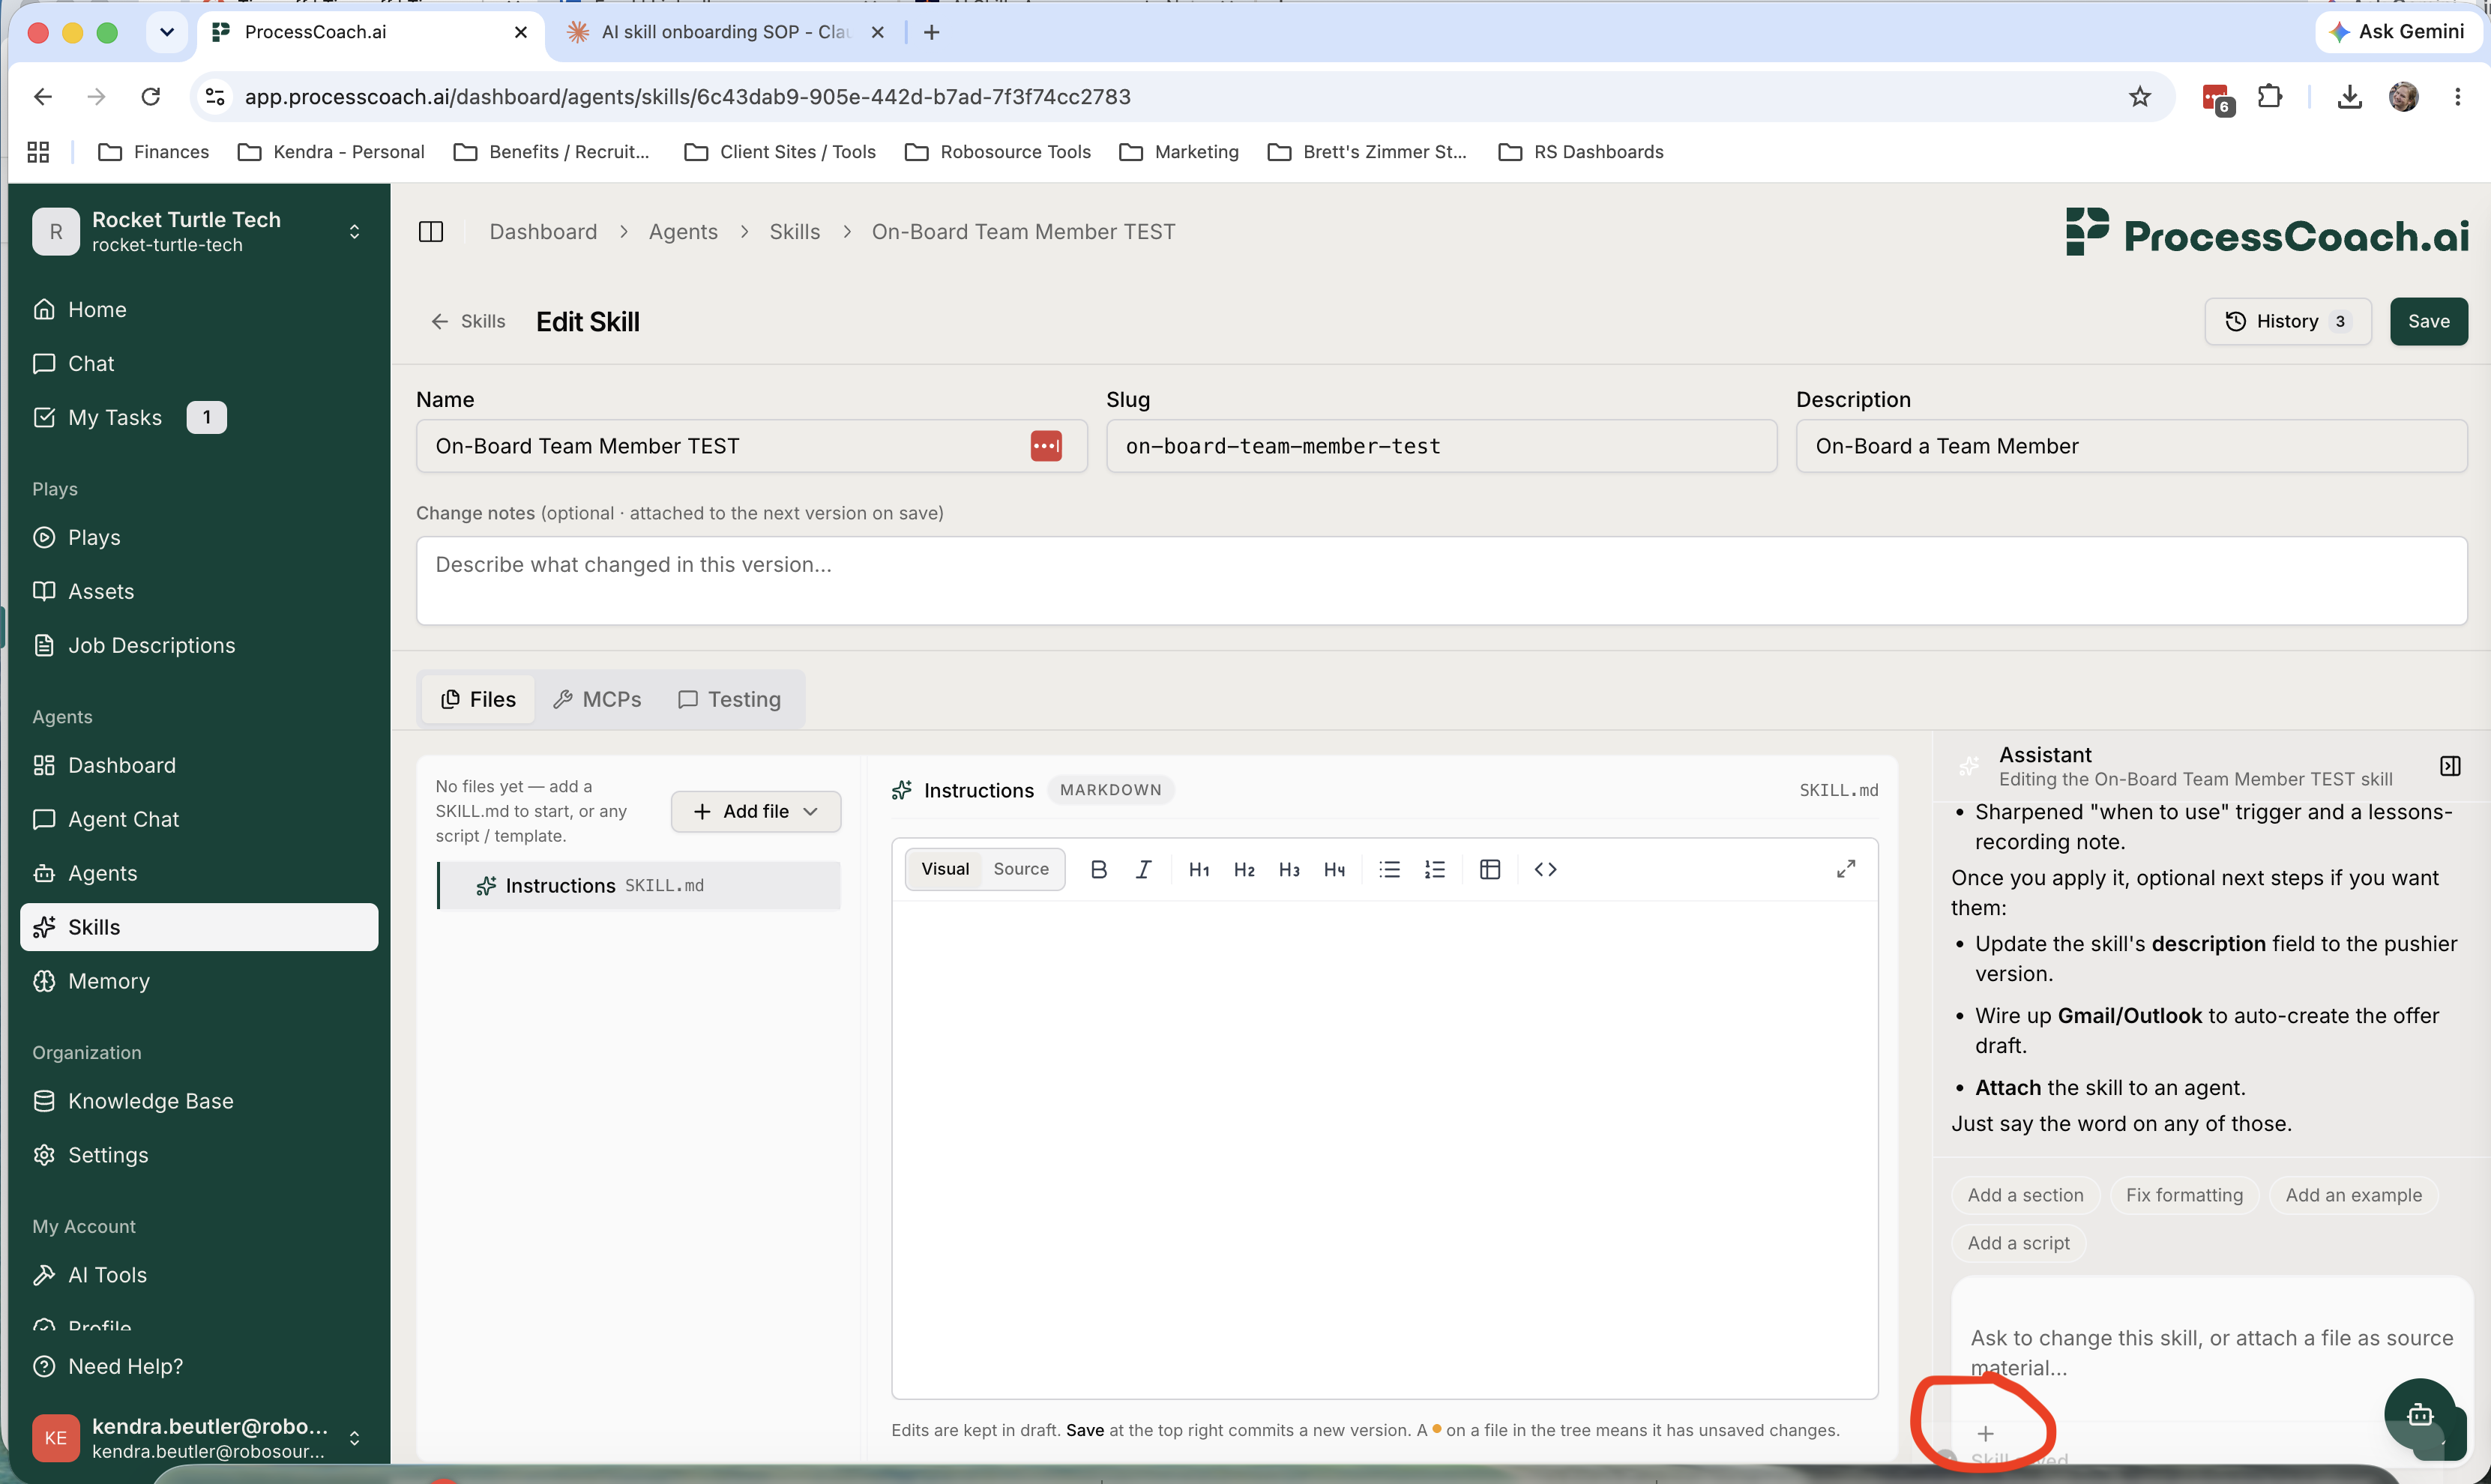
I’ll wait while ProcessCoach builds out the Skill. ProcessCoach is asking me a few clarifying questions, which I’ll answer. And then I’ll click “Create Skill” in the top right-hand corner.
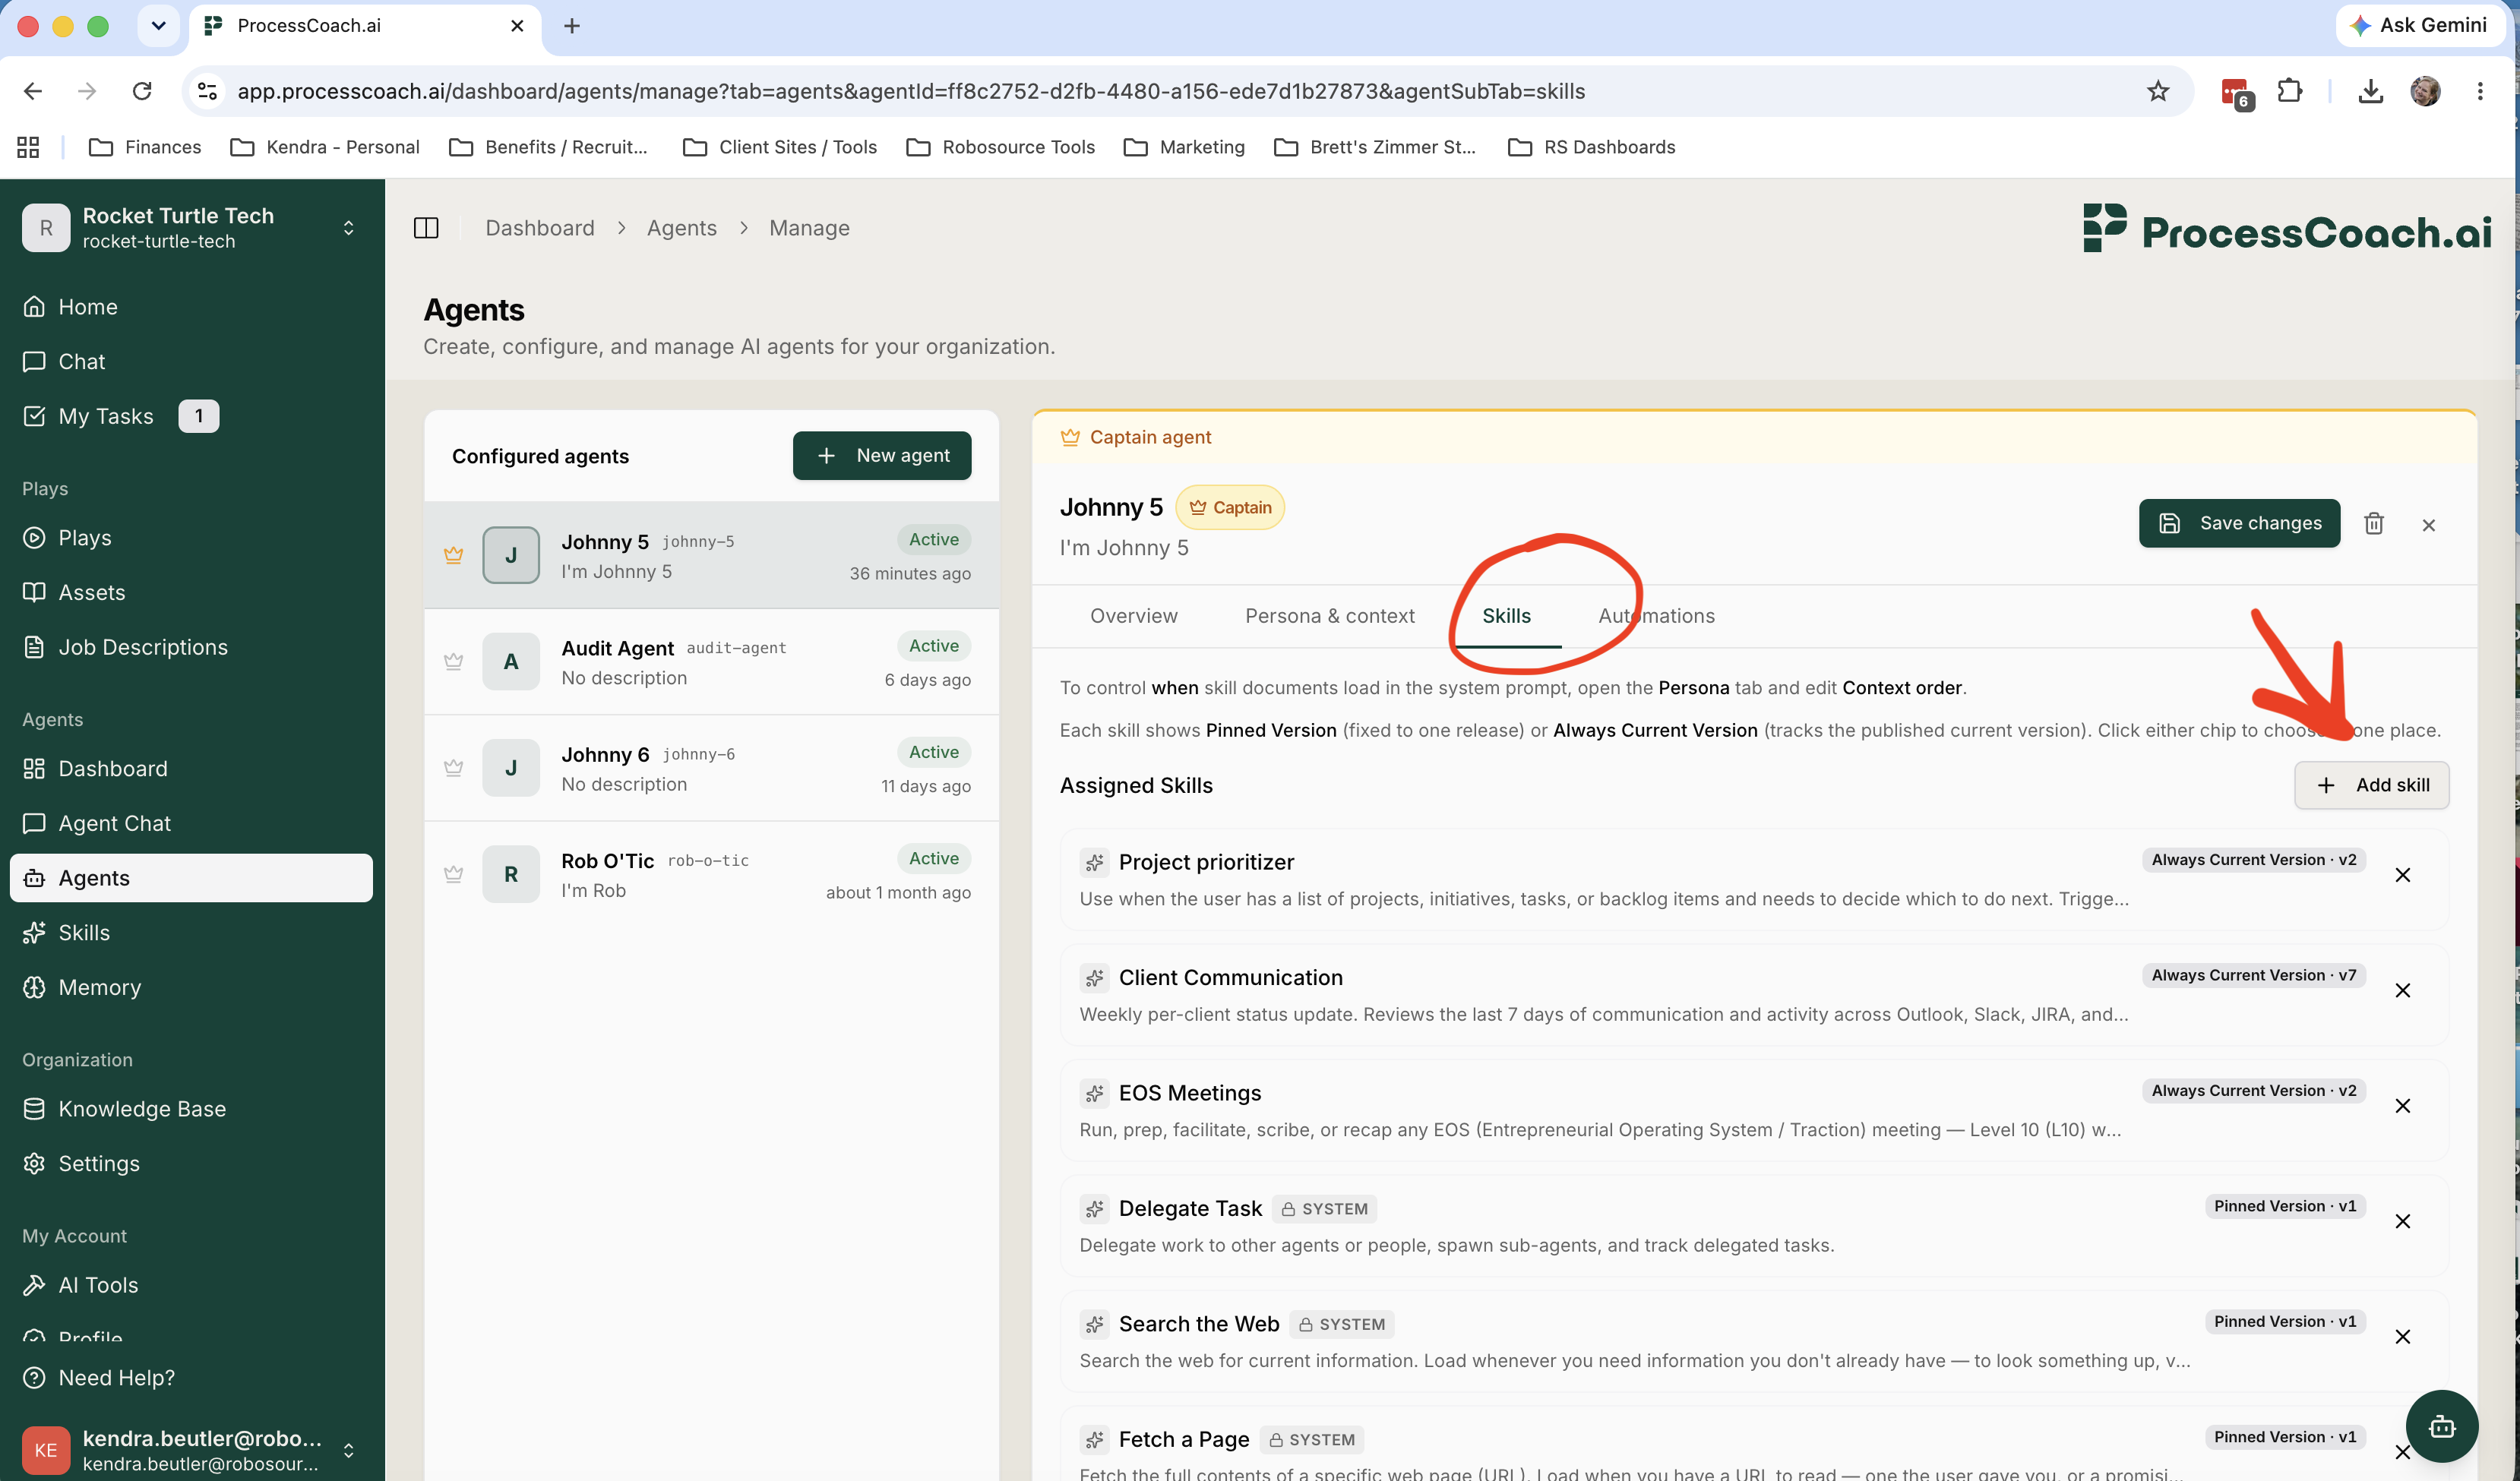
Now, I need to make sure the Skill is attached to an Agent. Go to “Agents” on the menu bar. Choose an Agent from the list OR create a new agent. Best practice is to create agents with specializations. For my Team Member On-Boarding Skill, for example, I might create an Agent that specializes in HR activities. Once you have the proper Agent selected, click the “Skills” tab for the Agent, and then click “Add Skill.” If you want to make sure your Agent is always on the newest version of your Skill, select the checkbox at the top, then find your skill. Save changes.
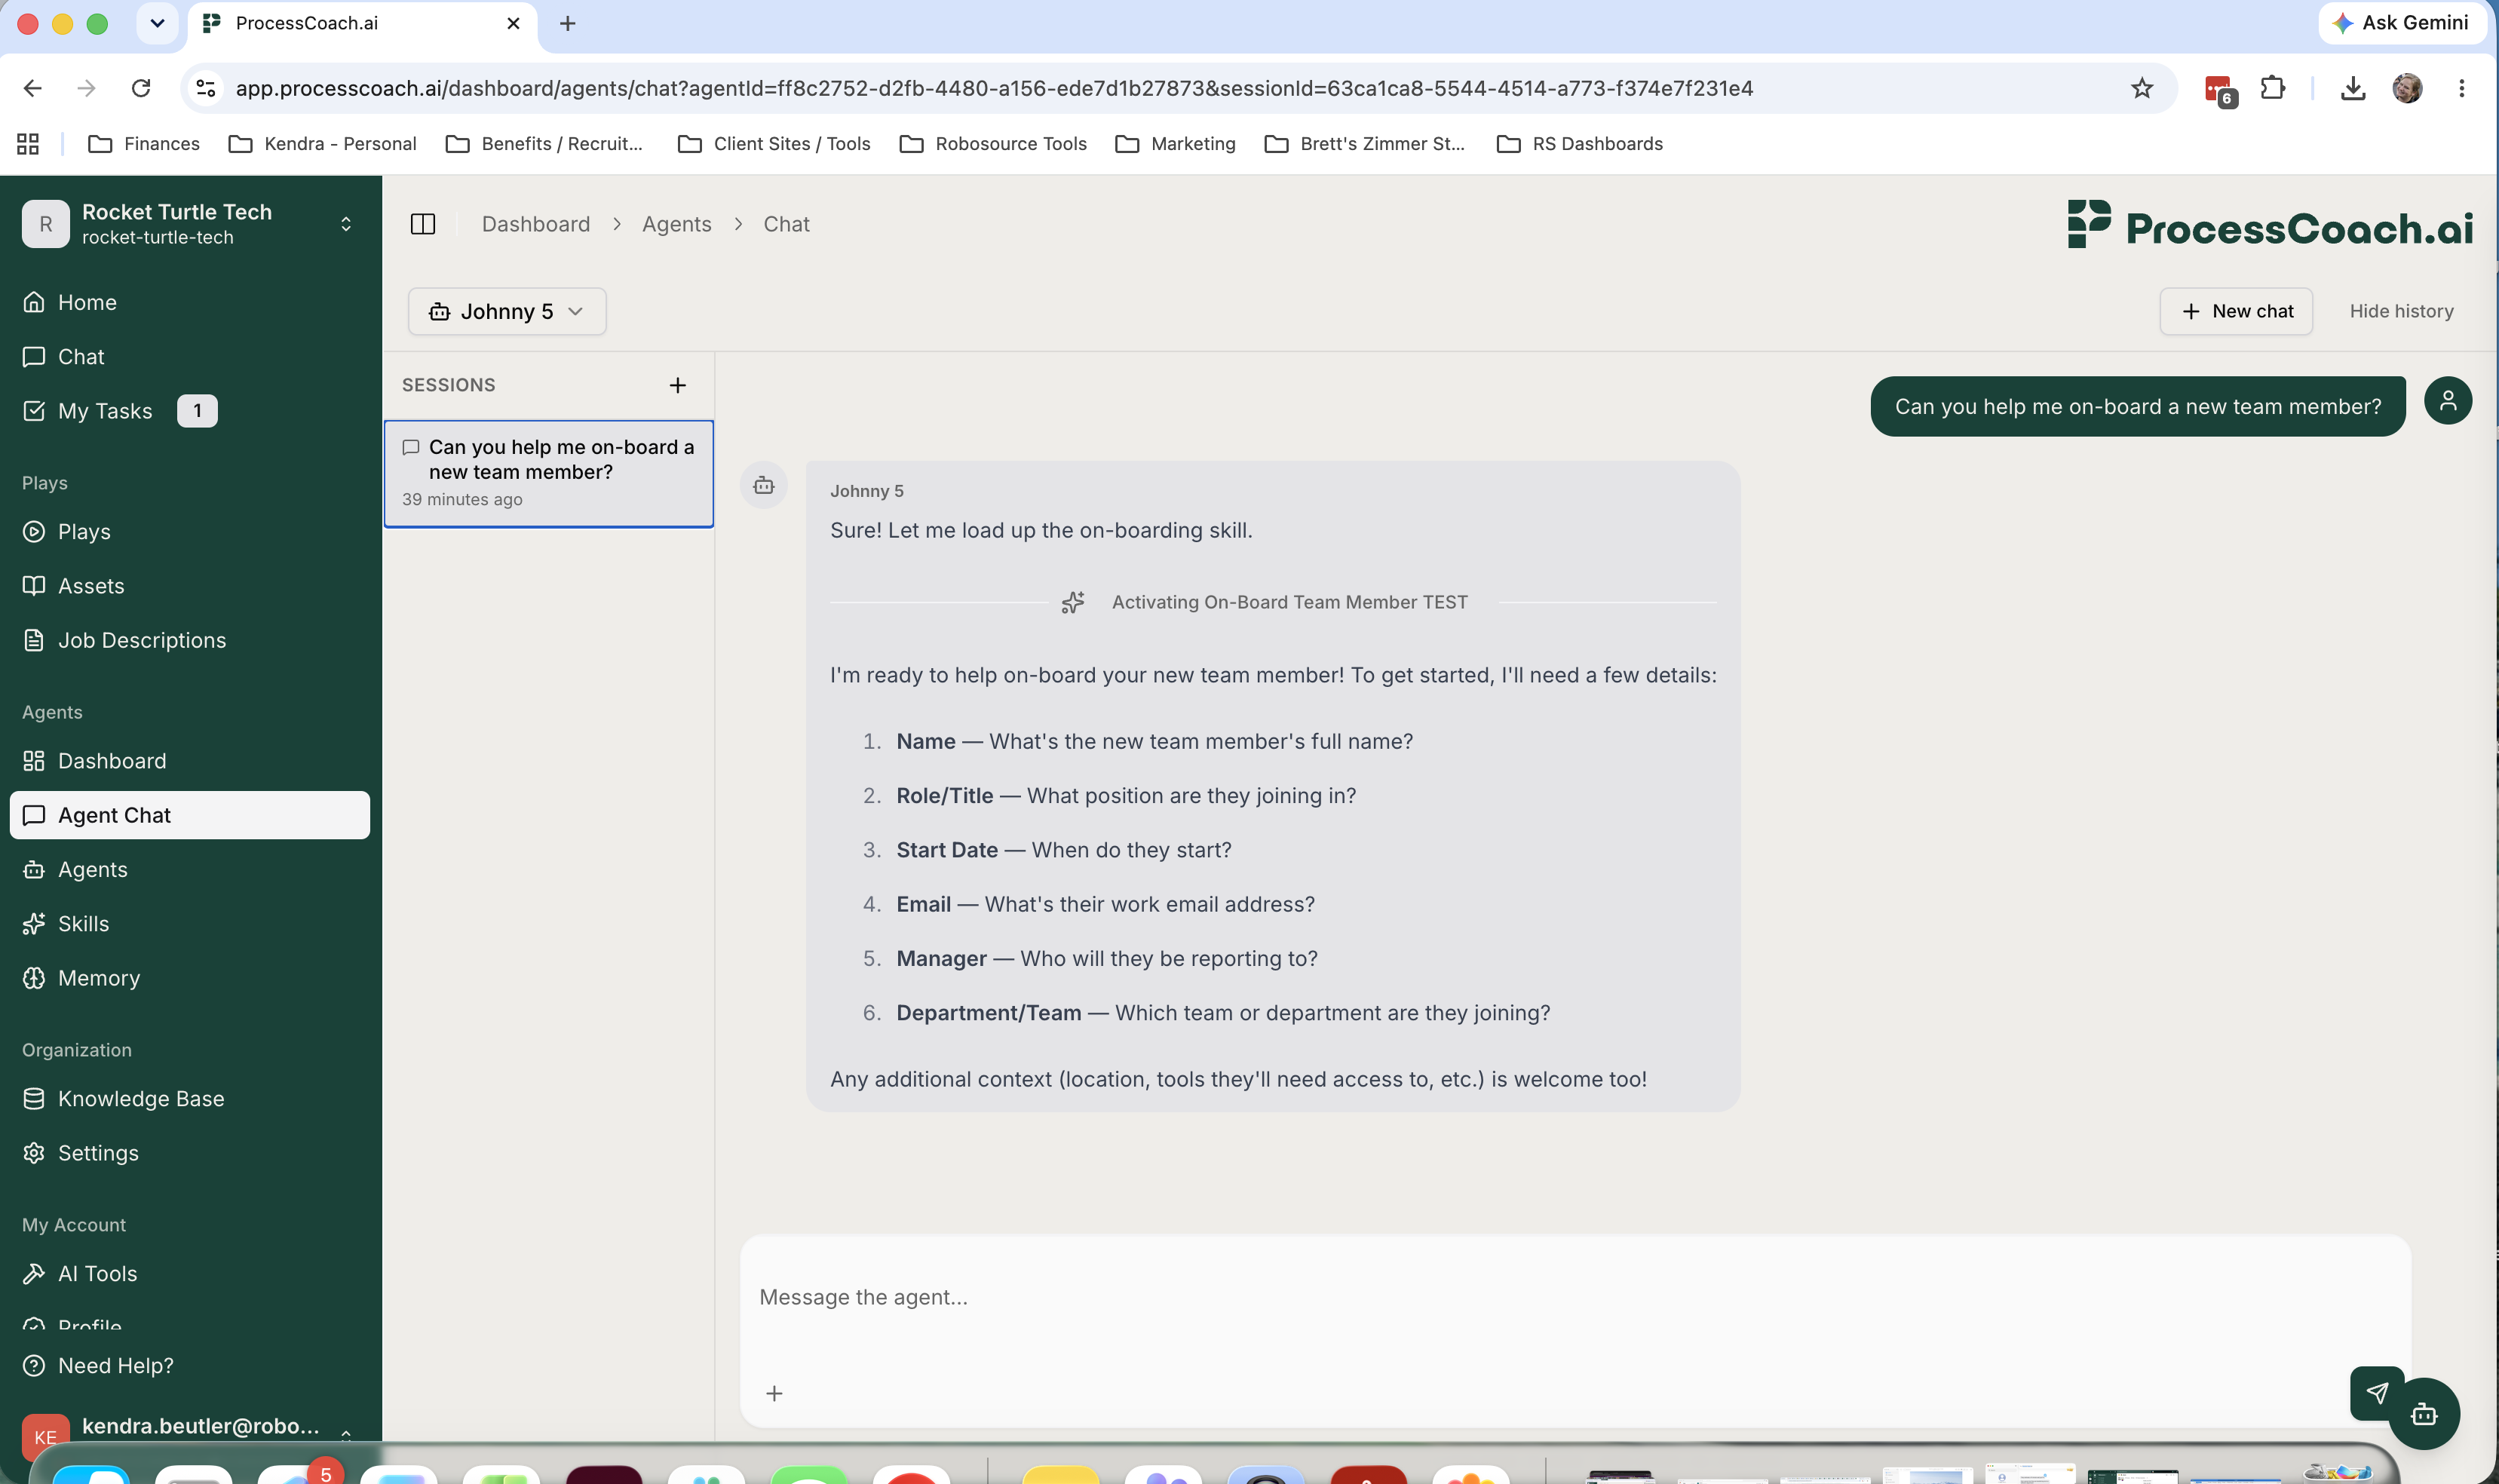
Now, try out your Skill. Go to Agent Chat. Ensure that the right Agent is selected, then ask the Agent to run your Skill.
Finally, you can make any needed tweaks by going back to “Skills” on the menu bar, finding your Skill, clicking the “Pencil” button to edit, and then working with the Assistant on the right-hand side. Chat with the Agent to make adjustments, then agree to update the Skill. Keep tweaking it until you’re satisfied.
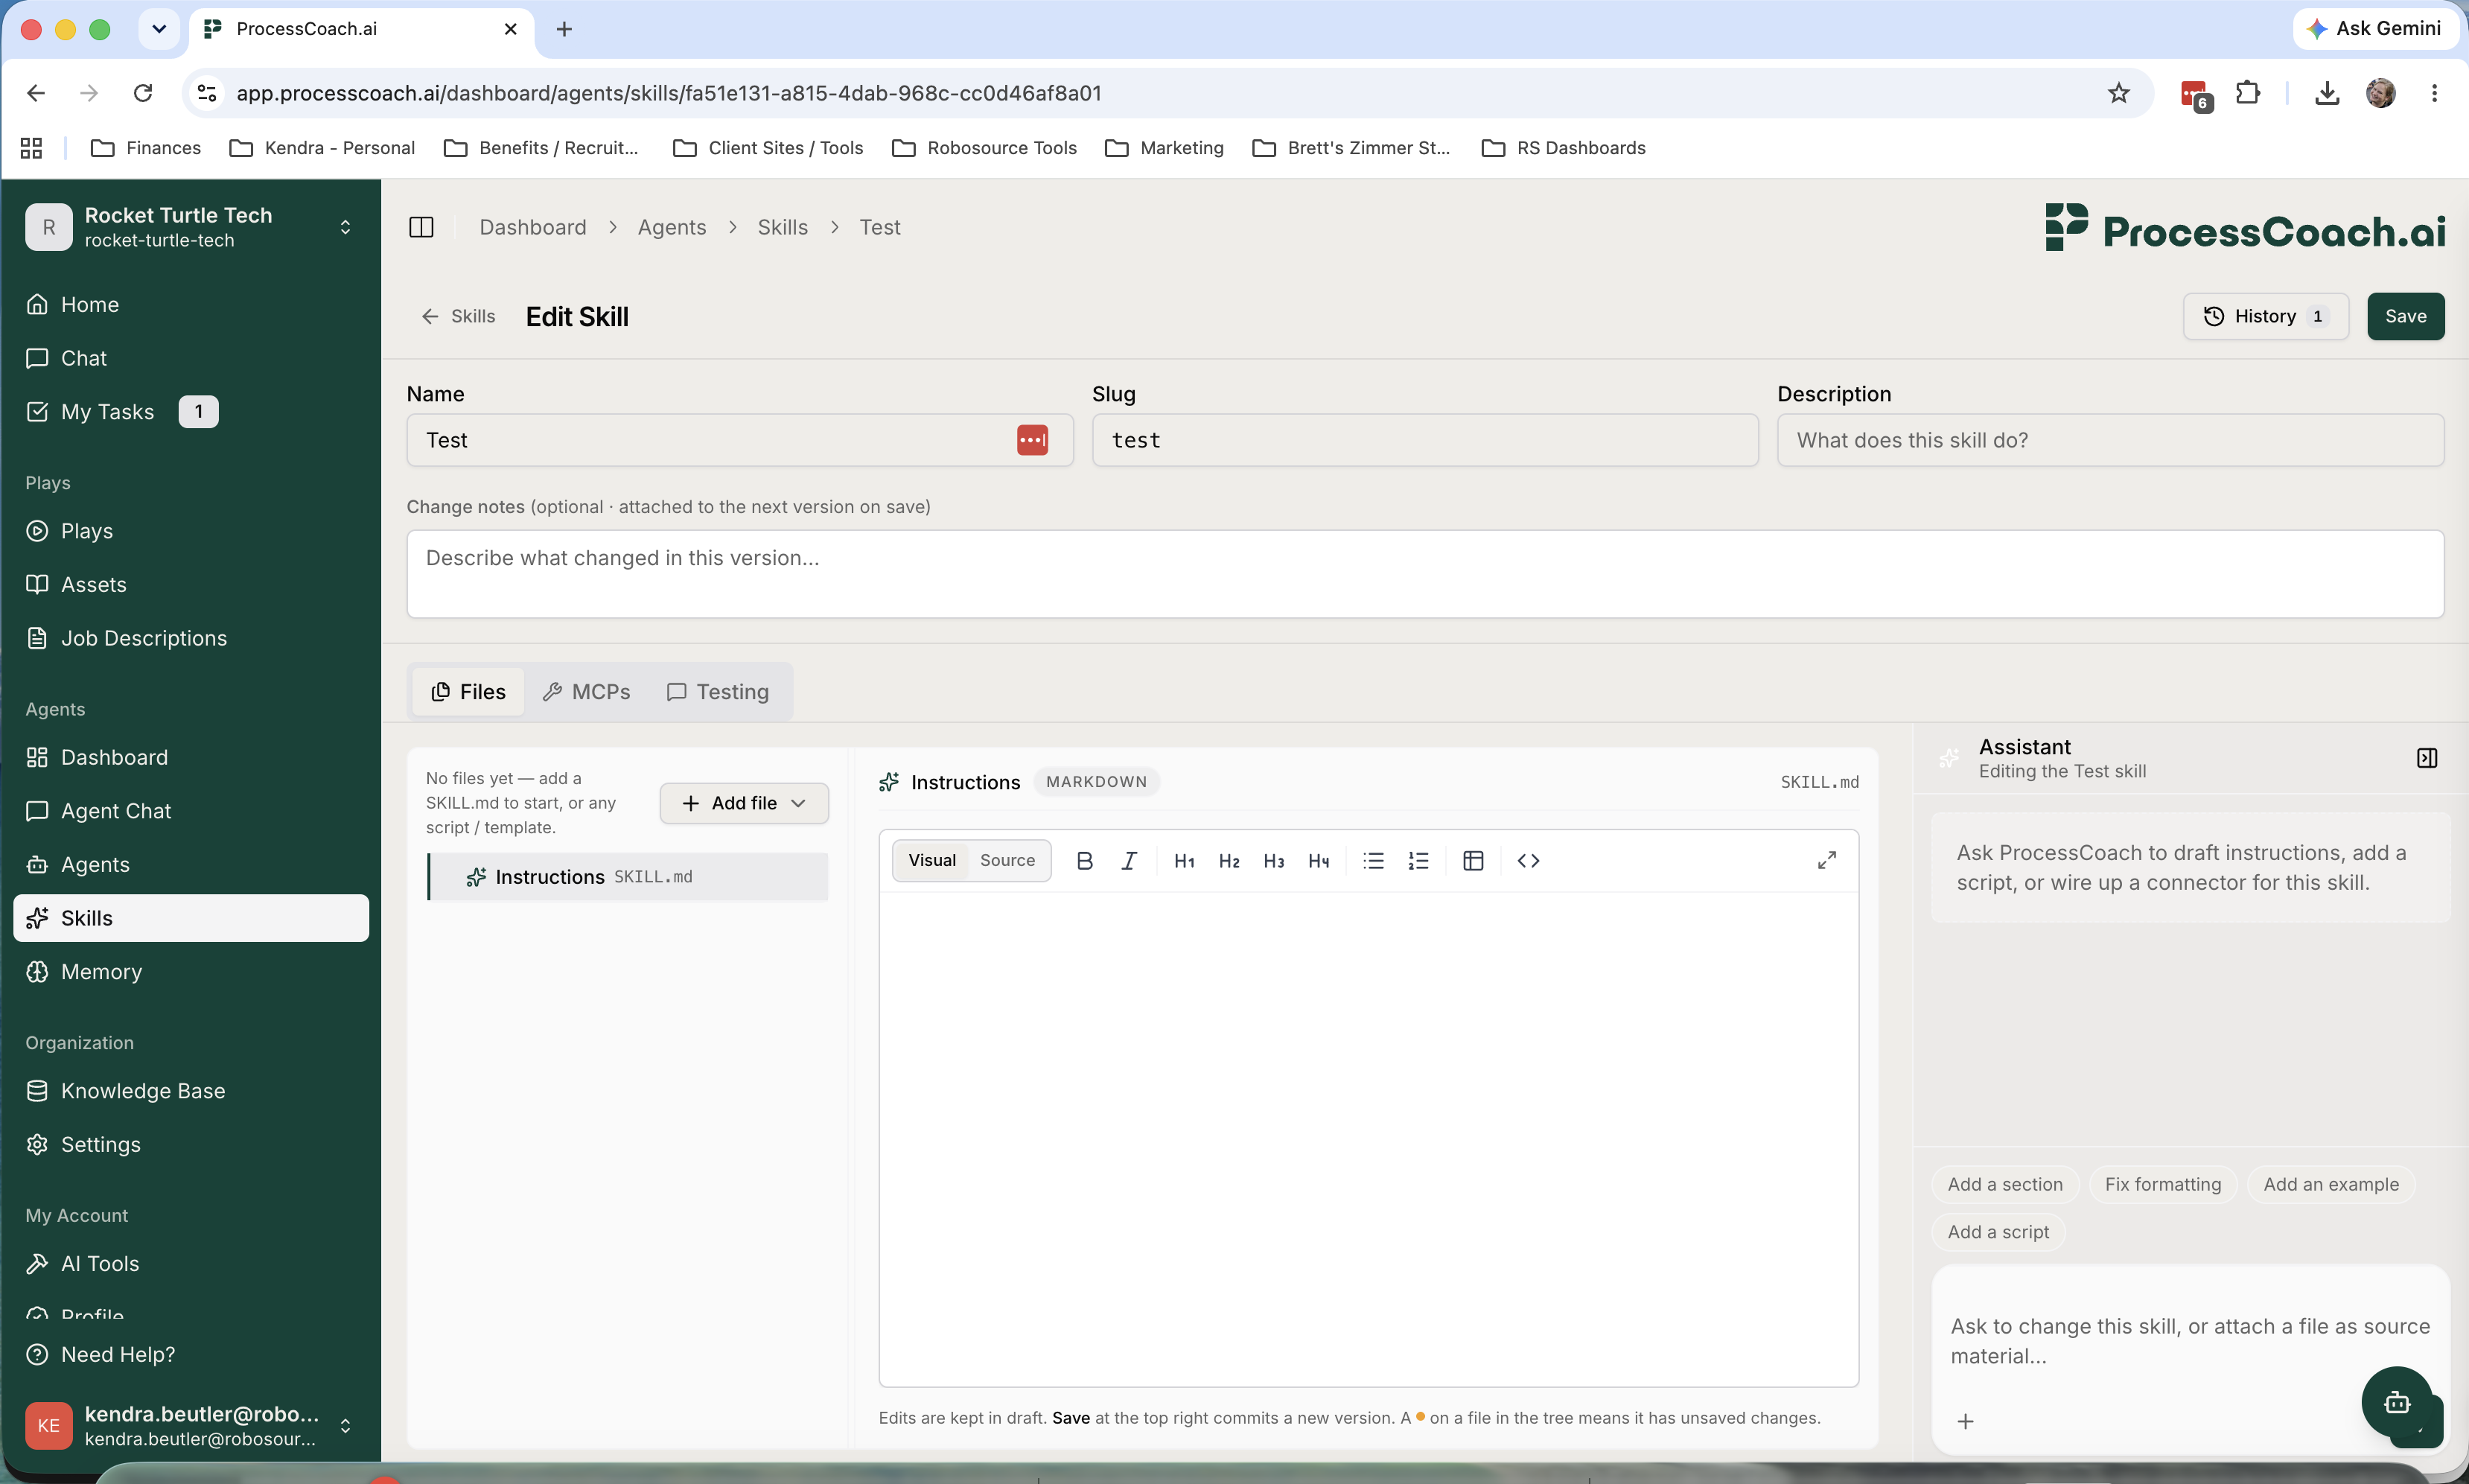
That’s it! Now you’ve created a new Skill for your Agent. Run it again and again!
Running into problems? Click the “Need Help?” button in the lower left-hand corner.
Talk to the Robosource team about what's worth automating first.